12.17.2010

Wendy's Natural Cut Fries-A Review


As a Foodbuzz featured publisher you get perks.

What kind of perks you ask?  Well occasionally you get picked to try something new.  I like this perk - a lot!  I love trying new things.  I love that moment right before you try it, the expectation, the anticipation, the excitement.   Sometimes it is fantastic and you can't wait to try it again and sometimes you really wish you never tried it at all!

Well I received a perk a couple of weeks ago.  Wendy's recently revamped their menu, they are striving to get back to what counts - the food.   Real food the way it should be instead of the mass produced fast food we are all used to seeing (and perhaps indulging in in moments of weakness).

The first menu item to get a make over was their fries.  To be honest Wendy's fries pre-make over were never really my favorites; my favorites have always been Arby's curly fries - I like my fries on the spicy side.  So I wasn't really expecting much from this product review.  But I thought I would keep an open mind and just dive in. 

The new Wendy's fries are advertised to be natural cut russet potatoes with skins on and a sprinkle of sea salt.  Sounds great right?  Well in fact I was pleasantly surprised by them.  They actually tasted like potatoes, honest to goodness fresh potatoes.  The sea salt enhanced the flavor just right and for me was just enough.  Overall I liked the new fries but moreover what I liked most was that fast food is making an effort to bring back real food.  This is a trend I hope to see continued and broadened because it is important to remember that food should be not only great tasting but good for us too and that can only happen if we stick to what is real! 

I suggest you go out and try these new fries and let me know what you think, I don't think you will regret it!

12.03.2010

Shimmering Snowball Cookies


Ah...the Christmas holidays!  Let the baking begin!!!

Every year in my kitchen I have the same dilemma; there is so many things to be done and NEVER enough time to do them in.  But from years of rushing, stressing and maybe even a little crying, I have learned that it doesn't matter, because Christmas will always turn out great.  Which for yours truly is quite ironic seeing as I am a perfectionist!

To be a bit more specific, when I say "things" getting done I am talking about food "things" (surprise surprise).  This is my favorite time of year.  I break out my notebooks, cookbooks, and assorted sheets of scrap paper - anything that might contain a recipe.  Some tried and true, some traditional, and some off-the-wall crazy!  Then I just sit back with a mug of hot tea and plan out my holiday cooking/baking list.

Now I must warn you my goals are totally unrealistic...there is just so many yummy recipes and I want to make them ALL.  I just can't say no.  (Am I the only one with this problem??)  This year, of course, is no different-10, 20, 100 recipes have all caught my attention at one point or another in the last month or so.  Each one making me giddy, excited and running to the store for more ingredients. 

First up, these fantastic little white mounds that I am re-naming (the name on the recipe was super cheesy) Snowballs. 

This came into my possession via my mom.  To make a long story short (or at least I will try to),  every year my mom gets these holiday books from various publishers.  Some contain crafts, some decorating tips, and most are filled with holiday cooking ideas.  Everything from Christmas Eve dinner to easy to make gifts from the kitchen.  I know what you are thinking..."how fantastic, I love those books"...yeah me too.  But my Mom...she HATES them.  Don't get me wrong she is not an anti-Christmas Scrooge.  She is, however, anti-cooking.  Spending countless hours in the kitchen is not something she is interested in.  So after she has complained to me about receiving ANOTHER holiday book, she offers it to me!  Woohoo...more recipes to add to my collection...ah...the possibilities!!!

It was in one of these books that I found these little jewels.  They are wonderfully cute, versatile and have a melt-in-your-mouth texture that will surprise you.  I am not kidding when I say they are a breeze to make, everything is done in a food processor!  No mess, and not complicated!  They can be decorated in a variety of ways: vanilla sugar, cinnamon sugar, heck..any type of sugar, or maybe even a delicate glaze!  I like white on white decorating during the holidays so I opted for powdered sugar and a clear sparkling sugar.  Next time I may attempt a flavored sugar....(ohhhh dangerous!  ha)

Snowball Cookies
  • 1 1/2 cup all-purpose flour
  • 1/2 cup powdered sugar
  • 1/4 cup cornstarch
  • 1 tsp. vanilla extract 
  • 1 cup cold butter, cubed

Preheat oven to 350 degrees F

In the bowl of a food processor combine flour, powdered sugar, and cornstarch.  Pulse several times until combined. 

Through the feeder tube add several cubes of butter at a time, pulsing several times in between additions.  Add vanilla and keep pulsing until the dough starts to cling and form a ball. 

Shape the dough into 1 1/4" balls.  Place on parchment lined cookie sheets about 2" apart.  Bake for 12 minutes or until the edges are brown.

Roll warm cookies in sugar, or dust in powdered sugar. 

10.19.2010

Cinnamon Ricotta Cookies


Have I mentioned recently that Ricotta Pancakes are fluffy little clouds of goodness?

Oh I have?  Well...what if I said that you can have all of that in a cookie too?  A cookie that is not-too-sweet and fluffy-soft like a down comforter.  In fact I have it on good authority that they have often been referred to as "cookies from heaven", they are that unforgettable.

One may say that that is too good to be true, and normally I would agree.  I mean, how can something be THAT good?  But this time I am telling the truth-no exaggeration, pinkie swear! 

After saying all of this I am pretty sure that it won't be too hard to believe that I had a monster craving for these cookies.  I knew I had to make them, pronto, like do not pass Go-do not collect $200 kind of pronto. 

But there was one thing I wanted to add to them.  I know what you are thinking, why change something that is supposed to be so perfect?  And in the back of my mind I was saying the same thing,  "if it ain't broke don't fix it".  But seeing that it is fall and all I hear about are pumpkin patches, corn mazes, and fall-inspired recipes, how can I ignore that??  I had to personalize them for the fall season.

How so?  Easy.  As much as I love lemons in the summer, I love cinnamon in the fall.  The smell of cinnamon wandering through the house on a cool day/night is heavenly.  As the fall sets in so does my longing for cinnamon.  So the decision was easy, add cinnamon to these lovelies and let perfection get perfected!

So I set out to combine my two cravings and came up with these little bundles of joy.  As I sit here and think about them, I am finding that the warm fuzzy feeling that they create, is coming over me yet again.  Hmmm...might have to bake some up soon...

UPDATE:  A wonderful food blogger that goes by the name Spicie Foodie, find her here, has set up a really cool interactive monthly link up.  Your Best Recipes is a way to share with others the best of the month.  This was the first month, October, and the response is really great.  I encourage you to stop by her page and participate dangit!  And for any readers that are here because of YBR, welcome!  Feel free to comment, linger and follow!  Happy Halloween everyone!!

Cinnamon Ricotta Cookies
adapted from Giada De Laurentiis 

  • 2 1/2 cups all-purpose flour
  • 1 teaspoon baking powder
  • 1 teaspoon salt
  • 1 stick unsalted butter, softened
  • 2 cups sugar
  • 2 eggs
  • 1 (15-ounce) container whole milk ricotta cheese
Glaze
  • 1 1/2 cups powdered sugar
  • Milk, amounts vary
  • Cinnamon, to taste
  • Vanilla extract, to taste
Preheat the oven to 375 degrees F.

In a medium bowl combine the flour, baking powder, and salt. Put aside.

In a bowl of an electric mixer beat the butter and sugar until light and fluffy.  Add the eggs, 1 at a time, beating until incorporated. Add the ricotta cheese and continue beating until combined. Stir in the dry ingredients.

Line baking sheets with parchment paper. Spoon the cookie dough (about 2 tablespoons per cookie) onto the baking sheets. Bake for 15 minutes, until slightly golden at the edges. Side note: The bottoms of these cookies brown much faster than the rest of the cookies so do not rely on just looking at the tops to see if they are done, I usually turn over one cookie and see how brown the bottoms are to determine doneness.  If they get a little too dark, don't worry the flavor is not damaged and they will not taste burned.  Remove from the oven and let cool.

Glaze:

I winged this glaze so this recipe is not as precise as I usually post on here.  Basically it goes a little something like this...

In a medium sized bowl measure out the powdered sugar.  A little at a time add in milk and stir until you get a pourable consistency.  Add vanilla extract and cinnamon to taste.  I like mine pretty cinnamon-y so I added several teaspoons.  Just keep tasting and adding as you see fit.   Spoon about 1/2-teaspoon onto each cookie and use the back of the spoon to gently spread. 


10.10.2010

Breakfast for Dinner


So to be honest I am not a breakfast person, well not when it comes at 8 in the morning (give or take 2 hours).  My idea of breakfast is making a cup of coffee, which last week consisted of me putting water in the carafe placing it in the coffee maker and turning the switch on...can you imagine if I tried to actually make something?  It could be catastrophic.  So to say mornings and I don't get along is a bit of an understatement.   

"But breakfast is fantastic" you say.  Oh I agree, there is nothing like warm fluffy pancakes, or jam-packed omelets...oh and don't get me started on the fantastic qualities of  bacon, trust me when I say I LOVE bacon!  But if you read the first paragraph, (and if you didn't I will give you a moment to go back and tackle it)....you know that these things would be way too complicated for my morning-impaired mind.

So to solve my little conundrum I frequently enjoy a little thing I like to call breakfast-for-dinner (I know the name is not that original, but it is descriptive!).  This way I get to enjoy all of the breakfast yummy-ness at a more functional time of day. 

Tonight was a breakfast-for-dinner night.  I had some leftover ricotta from the cookies I made last week (post to come soon for those, they were fantastic!) so my first thought was ricotta pancakes.  This was my first attempt at these lovely little bundles of fluffiness and it is safe to say that it will NOT be my last.  I paired them with a simple strawberry sauce and the combination was wonderful, light and perfect for dinner. 

So I strongly urge you to have breakfast-for-dinner this week and put these on the menu, you won't be disappointed.


Ricotta Pancakes
adapted from: the kitchn
  • 1 cup ricotta cheese
  • 3/4 cup flour
  • 1/2 teaspoon baking powder
  • 1 1/2 tablespoons sugar
  • pinch salt
  • 3/4 cup milk
  • 3 eggs, divided
  • 1/2 teaspoon vanilla (I love vanilla so I added a splash more)
If your ricotta is a bit runny, or you suspect that it may have a lot of moisture, place it in a fine mesh strainer about 30 minutes before you start, to drain off the excess liquid.

Combine the dry ingredients: flour, baking powder, sugar, and salt in a medium sized bowl. In seperate bowl combine ricotta, milk, egg yolks, and vanilla.

Wet ingredients - dry ingredients

In the bowl of an electric mixer beat the egg whites until stiff peaks form.  In the meantime, add the dry ingredients to the wet ingredients, stirring until just combined. Gently fold in the egg whites one half at a time.

Eggs whites beating away

Heat a griddle, or large pan over medium-high heat, and brush the surface with butter or vegetable oil. Using a 1/3 cup measure (smaller or larger cups can be used depending on how big you desire your pancakes to be) pour batter onto the griddle/pan. Cook pancakes till they are golden brown, 3-4 minutes each side.


Strawberry Sauce*
  • ¾ cup sugar
  • 1 cup water, the colder the better
  • 3 tbsp cornstarch
  • 2 ½ - 3 cups strawberries (fresh or frozen)
In a small bowl dissolve cornstarch in the cold water.  Rinse and hull strawberries if using fresh, for frozen berries thaw and drain.   Depending on your preference you can slice the strawberries or place them in a food processor to puree them.  In a large sauce pan combine all the ingredients.  Cook over a medium heat until thickened.  If you run your finger across the back of the spoon (be careful it will be HOT!) and it leaves a path then it is thick enough.  Serve warm.


*This sauce is great and has a million uses, I have used it as a cake filling and over ice cream.  The possibilities are many!

10.08.2010

A Crave Worthy Soup


It has been way, way, WAY too long since I have posted something new and for this I apologize (sorry!).  But I am happy to say that that is in the past!  Can I get a woohoo?

I have been using this time off wisely...scheming, planning, and dreaming of new recipes to bring you and I have to say (patting myself on the back) that there are some good recipes to come.

Now on to the good stuff...

The weather is getting cooler and fall is creeping in, so the idea of a warm cozy soup sounds so inviting.  There are a million wonderful choices but for me there really is only one...Italian Wedding Soup.  I can't say what in particular makes this soup such a delight.  Maybe it's the meatballs or perhaps the spinach...ohhh what about the ribbon of egg running through the broth? 

Perhaps I am getting carried away (ha I think not!)

Whatever it is, it is the only soup that I actually crave!  Normally I am not a huge fan of soup, I just want more, BUT after a steamy bowl of wedding soup and a nice crusty bread...I am left wanting nothing else...I take that back, I want another bowl.  

Best thing about it?  It is super easy!  I usually make the meatballs the same day but it would be a perfect use for those frozen meatballs you may have in the freezer.   If you are in a hurry (a last minute quick dinner perhaps?) I have used slices of Italian sausage, which was super tasty and added a bit of spice. 

Italian Wedding Soup
adapted from Giada De Laurentiis

Meatballs
  • 1 small onion finely diced
  • 1/3 cup Italian parsley
  • 1 large egg
  • 1 tsp. minced garlic
  • 1 tsp. salt
  • handful of bread crumbs
  • 1/2 cup grated Parmesan
  • 8 oz. ground beef
  • 8 oz. ground pork
  • pepper to taste
Soup
  • 12 cups low-sodium chicken broth
  • 1 lb. frozen spinach, thawed and drained
  • 2 large eggs
  • 2 Tbsp. grated Parmesan, plus extra for garnish
  • salt and pepper to taste
 For the meatballs, stir the first 6 ingredients in a large bowl.  Stir in the cheese, beef and pork.  Shape meatballs about 1-1 1/2 in. in diameter.  In a sauce pan add a Tablespoon or so of olive oil over medium-low heat.  Gently fry the meatballs until slightly brown.  Remove meatballs and set aside on plate.

First 6 ingredients

For the soup, bring the broth to a boil in a large pot over medium-high heat.  Add the browned meatballs and spinach, simmer until meatballs are cooked all the way through 5-10 minutes.  Whisk the eggs and cheese in a small bowl.  Stir the soup, while stirring slowly pour the egg mixture into the soup.  Season with salt and pepper to taste.

9.18.2010

Project Food Blog: The Countless Meanderings of a Curious Cook

WELCOME ALL TO THE FIRST PROJECT FOOD BLOG CHALLENGE!!! 


If you don’t already know, foodbuzz (awesome site by the way, you need to check it out) has a contest going on for food bloggers - a sort of cross between Top Chef and Next Food Network Star. This first challenge is a challenge indeed: What defines me as a food blogger?  What makes my blog unique? After much thought, a glass or two of wine and hours of conversation with friends I came up with a response. So sit back, have a cookie or two and see what I came up with…wish me luck!


P.S… A massive thank you goes out to my blogging family… your warm comments and support make this adventure that much sweeter. You are the cherry on top of this blogging sundae!


What makes The Blooming Spoon unique?


Hmm…let’s see, let me think about that…

(10 minutes later)


…ok so I came up with a list (I LOVE lists):

1. curiosity
2. curiosity
3. curiosity


The conclusion…it is my curiosity that is the driving force behind what I do. This blog is an ever-changing kaleidoscope of my cravings and whims. I don’t have a background that includes watching my grandmother cook; there are few family recipes that were passed on and in fact, my mom makes it pretty clear that she loathes cooking! So it is my unique curiosity that makes The Blooming Spoon what it is. I look to try new dishes, ingredients and techniques and share those experiences with the equally curious. There is always something new to discover, to explore. One day the tradition of classic French cuisine stirs my imagination and I will seek something from Julia Child and the next day I will be throwing ingredients into a bowl with my fingers crossed that it is edible. The spontaneous, the unexpected, the new -  they capture my imagination and I run with it. Basically I am an all-inclusive food blogger!


I describe The Blooming Spoon as “the countless meanderings of a curious cook”. This is my journey as a foodie, to explore all that I can without setting boundaries. Why constrict myself to one road when the food landscape is a maze of a million roads? Getting lost in this maze is what makes it all so much fun; it’s what keeps me going. With each turn that I take there is so much to see, smell and taste. These countless meanderings teach me something new about myself, about the food and about the world. As if that wasn’t enough, I get to share all of that with my friends and family. Through The Blooming Spoon, they get to be on this journey with me; and if you ask me - that's pretty unique!

8.31.2010

Fish Tacos


I am on a mission.  A mission to make the perfect fish taco.

For years I have been hunting, experimenting and tweaking fish taco recipes....I may be a tad bit obsessed!  I am not sure what makes the perfect fish taco, I just know that when I taste it I will know, a cook's intuition you could say.  I am seeking the perfect blend of delicate flakiness and hearty crunch, a spicy bite with a cool touch, and dang it I will find it!  

So what am I tweaking this time?  The fish.   Usually I just grill the fish fillets but this time I decided to try something I have been wanting to try for years, a potato chip "breading".  I thought it would add a kick of crunch that was missing....and it did!  The fish had a surprising crunch that added a depth to the taco that it so needed.  Combined with the spicy cilantro creme and cabbage it was a huge step towards perfection! 
    
Super easy and slightly unexpected make these tacos a joy to dive into on a warm summer evening, especially when paired with a nice cold beer!

Crunchy Fish Tacos
  • 2 fillets of white fish (I used cod but any white fish will work)
  • 2 limes
  • 1 clove of garlic, minced
  • 2 eggs
  • Several handful of potato chips (that is a very scientific measurement by the way!  :)  )
  • Corn tortillas
  • Shredded cabbage blend (I used a cole slaw blend to make it easy)
  • Cilanto Creme (recipe follows)

Marinate the fish fillets in the juice of two limes and minced garlic for 30 minutes, set aside.  Place  the potato chips in a plastic zip bag and crush until they are pretty fine, but still large enough to recognize that they are potato chips.  If they are too big they will not stick onto the fish fillets.  Place crushed potato chips onto a plate.  Beat two eggs in a small bowl and set aside. 

After the fish have marinated cut into smaller pieces, I cut down the center of the fillets creating smaller fish stick sized pieces.  Dip the cut pieces into the eggs and turn to coat, drain off excess.  Transfer to the crushed potato chips and turn to coat.  Place breaded fish into a pan with about 2 tablespoons oil set over medium heat.  Fry for approximately 5 minutes each side or until fish is golden and flaky.  Set aside on paper towels to absorb any excess oil.

In a lightly oiled pan over medium heat fry the corn tortillas, a couple minutes on each side.  Again place on paper towel to absorb oil.

To assemble your tacos place 2 tablespoons Cilantro Creme down the center of tortilla.  Place the fried fish on creme and top with the cabbage blend.  If you want to add a bit more flare and color, add a couple of whole cilantro leaves on top!  Enjoy!!

Cilantro Creme
  • 8 oz sour cream
  • 1 cup cilantro
  • 2 scallions
  • 1/2 Serrano pepper, or more depending on how hot you want it
  • Salt and pepper, to taste

In a food processor place cilantro, scallions, and Serrano pepper (minus the seeds) and blend until finely chopped.  Add sour cream and continue to blend until mixed well.  Add salt and pepper to taste.  Refrigerate at least 30 minutes before trying, the longer it chills the better it is!

8.15.2010

Zucchini alla Parmigiana


It is time to celebrate!

Celebrate what you ask?  Zucchini season!

Yep, this is the time of year when the stores and farmer's markets are filled with the delicate loveliness of zucchini.  I happen to be a huge fan of this vegetable (did you know that zucchini is technically a fruit, I never knew).  It can be used in a variety of ways, both savory and sweet, and all are perfectly wonderful.  Personally I love to saute it simply with olive oil and garlic, but this past weekend I decided to do something a bit more. 

Zucchini tends to be the supporting dish, always pushed aside for the main dish....this time I wanted to make it the star of the show...what I am trying to say is, nobody puts zucchini in a corner (love that movie quote!!) at least not this time.  Zucchini alla Parmigiana is a beautiful combination of all things Italian: lightly fried zucchini, tomato sauce, mozzarella and parmigiano-reggiano cheeses, and last but certainly not least fresh basil!  A one dish wonder that is certainly the star of any dinner. 

Just in case you are a fan of eggplant feel free to substitute it for the zucchini as this dish is originally made with eggplant.  I think you will find it equally as fantastic!
 

Zucchini alla Parmigiana
     adapted from: Melanzane all Parmigiana
  • 3 garlic cloves, minced
  • 4 cups (approx.) of canned tomatoes, crushed
  • Fresh basil leaves
  • 1 tsp. sugar
  • 4-5 medium-sized zucchini
  • 2 eggs
  • 2 cups flour (approx.), used for dredging 
  • 1 medium mozzarella (4 oz), diced, or the 12 oz tub of bocconcini -sized mozzarella, quartered
  • 12 oz (approx.) Parmigiano, grated
  • Vegetable oil for frying
  • Salt and pepper, to taste

Preheat oven to 350 degrees.

In a sauce pan over medium heat saute the garlic in a bit of olive oil until slightly browned.  Add the tomatoes, salt, sugar and basil.  Simmer for approximately 20 minutes.  


Slice the zucchini lengthwise.  Try to keep the thickness consistent, around 1/2 inch is good.  In a small bowl beat the two eggs, pour out onto a plate.  On another plate place the flour.  Heat a good amount of oil in a large frying pan.  Dredge the zucchini slices in the flour, turn to coat and then dip each slice into the eggs, turn to coat.  Fry the zucchini for around 3 minutes each side, be careful not to crowd the pan.  Set aside each slice on paper towels to absorb excess oil. 
 
In a large, greased 9 x 13" baking pan spoon a generous amount of tomato sauce.  Set the fried zucchini in a single layer, top with mozzarella and parmigiano.  Repeat for a second layer, tomato sauce, zucchini, mozzarella, parmigiano.  Finish by topping with the remaining sauce, parmigiano cheese (be generous) and fresh basil.


Bake for 10-15 minutes. Allow to cool for 10 more minutes.  It is now ready to eat and enjoy. 


8.05.2010

The Season for Ice Cream


Who doesn't like ice cream...that is what I want to know?  Creamy, wonderfully sweet, and most importantly on summer days, it is COLD!...

(Unlike my forehead, the steering wheel or sidewalk!)

Ice cream and summer, they just go hand-in-hand.  It is undeniable, you can't have one without the other.  It is impossible...I have tried...it wasn't pretty!

Do you have a favorite summer ice cream memory?

Mine has to do with a certain smurf-blue bubblegum flavor.  When summer rolled around the ice cream shops opened and that was always my first choice.  It was a kid's dream...ice cream and bubblegum, holy sweetness overload!

And just like my childhood, once the summer hit, my ice cream maker opened for business!  I chose a super sweet, caramel-y flavor for the first of the season,  dulce de leche.  I am not going to lie, this recipe requires some patience.  The dulce de leche part of this creamy concoction takes 45 minutes of attention.  I suggest doing the dulce de leche and the first part of the the ice cream recipe the day before, chill it over night and pop it in the ice cream maker the next morning.  Made the long process not so bad! 

Believe me when I say that it is so worth it.  I enjoyed every second of it, plus it was fantastic with the home made apple pie that was on hand!

Dulce de Leche
  • 2 pt (4 cups) milk
  • 12 oz sugar
  • 1/4 tsp baking soda
  • 1/2 tsp vanilla extract
Combine milk, sugar and baking soda in a heavy sauce pan.  Over medium heat bring to a slow boil.  DO NOT STIR!

As the mixture approaches a boil it will start to rise.  Take it off the heat before it foams over.  Stir.

Set the pan over low heat and cook slowly, stirring frequently with a wooden spoon for about 45-60 minutes.  The mixture will slowly caramelize.

When the mixture turns a rich caramel-y brown and thickens (if  you wipe your finger over the back side of the spoon and it leaves a path then it is thick enough) but is still pourable remove from heat and stir in the vanilla.

Cool thoroughly.

Beginning of the process, milk is still thin and white in color

Starting to caramelize but still too thin

Final product...yummmm!


Dulce de Leche Ice Cream (pt. 2)
  • 3 cups milk
  • Dulce de Leche you made above
  • 6 oz heavy cream
  • 1/4 tsp vanilla
  • pinch of salt

Heat milk and the dulce de leche mixture in a heavy sauce pan until the dulce de leche is completely dissolved.  Remove from heat and add the remaining ingredients.  Chill well.

Place mixture in the bowl of an ice cream maker, and follow the manufacturers instructions for your particular ice cream maker.  I churned mine for about 30 minutes.  Place in a container with a air tight lid in freezer to continue the freezing process. 

8.01.2010

Tomato Sandwiches


A fantastic couple, tomatoes and basil.  I can't think of a better match.  Well, maybe chocolate and caramel....oh crap! That is besides the point!

What I mean is....

Tomatoes and basil are perfect for one another. Tomatoes are great on their own, delightful in fact, but add basil and...BAM!  They are freaking fantastic. They bring out the best in each other, kinda like peanut butter and jelly....oh crap, another great match!

So....yeah...tomatoes and basil - I think I am their # 1 fan...and perhaps...I may even be accused of obsessing a bit. I am always trying to find new ways to combine the two.  For the summer I have the perfect dish to satisfy my obsession - a tomato sandwich with an Italian touch.
Tomato Sandwiches
  • Ciabatta bread (or any type of bread that is a favorite)
  • olive oil
  • tomato slices, the fresher the better
  • pesto, this can be home made or store bought which ever you prefer
  • mayo
  • salt & pepper to taste
Slice the Ciabatta bread into fairly thin slices.  Brush one side of each slice lightly with olive oil.  Place oil side down on a grill pan (I just have this thing for grill marks...so cool!) or a griddle.  Toast to desired level.  In a small bowl mix about a tablespoon, or more depending on the size of your bread slices, each of mayo and pesto.  Since I love pesto I add just a touch more pesto than mayo...up to you.  Slice the tomatoes about 1/4-1/2" thick.  Spread pesto/mayo mixture over the toasted bread.  Layer the slices of tomatoes and top with salt and pepper to taste. 

There you have it a fantastic way to celebrate the union of two great ingredients...and super easy too!  Enjoy!!!

7.30.2010

Mmm...cheese


So there is little in this world that is more perfect than cheese. It can accompany wine to a black tie event, yet can relax at home with simple crackers...it would have been voted most popular in high school (and most likely to succeed!!!)

Is it obvious that I put cheese on a pedestal?  It can do no wrong!  So when I came across this recipe it was a no-brainer...it was going on the menu.  These fritters are delicious and easy.  Plus it lends itself to anything your creative imagination can come up with.   Substitute the cheeses with your favorites, add some spices...get crazy and have fun with it!!

If you need a push to get those juices flowing...

Cheeses: Gouda, chedder, mozzarella, Italian blend (mozzarella, romano, parmigiana)
Spices: garlic powder, onion powder, red pepper flakes, paprika, basil, oregano
Ok...now there is no excuse...get to it, the cheese is waiting!

Fritters:
  • 1 1/2 cups fresh whole milk ricotta
  • 1 1/2 cups shredded smoked mozzarella
  • 1/4 teaspoon salt
  • 1/4 teaspoon freshly ground black pepper
  • 2 cups panko (Japanese bread crumbs)
  • 2 large eggs
  • all-purpose flour
  • Vegetable oil, for frying
For the Fritters: In a small bowl combine the ricotta, smoked mozzarella, salt, and pepper.  On bowl #1 put the flour about a cup or so.  In bowl #2 beat the two eggs, and in bowl #3 pour in the panko.  Line a tray or large plate with parchment paper.


Scoop a 1 1/2 tablespoon ball of the cheese mixture into the flour and roll to coat. Transfer the ball to the eggs and roll to coat. Transfer the cheese ball to the panko and again roll to coat. Transfer the ball to the parchment-lined tray. Continue with the remaining cheese mixture.


Meanwhile heat 3 inches of vegetable oil in a large skillet to 350 degrees F. Fry fritters in batches, being careful not to overcrowd the pan, until golden, about 1 to 2 minutes. Remove with a slotted spoon to paper towel to drain.  Serve warm with Balsamic Dipping Sauce.


Balsamic Dipping Sauce:
  • 6 tablespoons balsamic vinegar
  • 2 tablespoons lemon juice
  • 2 tablespoons Dijon mustard
  • 1 tablespoon honey
  • 1/2 cup extra-virgin olive oil
  • 1/2 teaspoon salt
  • 1/2 teaspoon freshly ground black pepper
Combine the vinegar, lemon juice, mustard, and honey in a blender. Blend until combined. Add the oil in a steady stream while the machine is running. Season with the salt and pepper. Serve in a small bowl alongside the fritters.

Playing around...

What have I been up to lately?  Besides obsessing over meandering in my garden, making a mess in the kitchen or obsessively watching BRAVO?

Glad you asked...I have been getting a bit creative lately.  The usual decorating victims are cakes and cupcakes.  There is just so much you can do and when I get an excuse to do it, I go nuts!

These are two of my current favorites.  What do ya think?  Fun huh??


7.29.2010

My New York City love


New York City.  My first visit was over a year ago.  I left with hundreds (yes hundreds) of pictures, great memories and tired legs (another reminder I need to exercise more!)

But that isn't the point....

When I started unpacking, which I hate to do by the way, I found the best surprise.  Tucked away in the deep dark crevasses of my purse was my new love.  I squealed with delight, I thought we were separated forever!

The Black and White cookie. What can be said of this little wonder.  It is a cake in a cookie's body.  It is vanilla and chocolate.  It is dessert and breakfast (well at least for me it is).  It is the perfect answer for those of us that can't make up our mind.  In short, this cookie has it all!

I have been craving black and white cookies ever since.  Fantasizing flying up to NYC so I could indulge in them once again.  I no longer have to fantasize. Why you ask?  Because now I just follow a simple recipe and in a few hours I am back in New York with my love, once again!  Thank you Joy the Baker

Black and White Cookies

Cookies
  • 2 1/2 cups all-purpose flour
  • 1 teaspoon baking soda
  • 1 teaspoon salt
  • 2/3 cup well-shaken buttermilk
  • 1 teaspoon vanilla
  • 2/3 cup unsalted butter, softened
  • 1 cup granulated sugar
  • 2 large eggs
Cookies

Preheat oven to 350°F.

Whisk together flour, baking soda, and salt in a bowl. Stir together buttermilk and vanilla in a cup or small bowl.

Beat together butter and sugar in a large bowl with an electric mixer until light and fluffy, about 3 minutes.  Add eggs, beating until combined well. Mix in flour mixture and buttermilk mixture alternately in batches at low speed (scraping down side of bowl occasionally), beginning and ending with flour mixture. Mix until smooth.

Spoon a 1/4 cup of batter about 2 inches apart onto a buttered or parchment lined baking sheet. Bake in middle of oven until tops are puffed and pale golden, and cookies spring back when touched, 15 to 17 minutes. Transfer with a metal spatula to a rack to cool.  This should take around 15 minutes or so.


Vanilla Glaze*
  • 2 cups powdered sugar
  • 1 Teaspoon light corn syrup
  • 1/2 teaspoon vanilla extract
*I had to add milk to this recipe in order to get it to the proper consistency to spread.  Just pour a little splash at a time.  When you can pour it off of a spoon then it is perfect!  Do this before adding the vanilla or you will end up with little clumps of vanilla and powder sugar.

Chocolate Glaze
  • 4 ounces semi-sweet chocolate (I used mini chocolate chips, they melt faster and easier)
  • 3 Tablespoons butter
  • 1 Tablespoon light corn syrup
 In a bowl, whisk together the powdered sugar, 1/2 teaspoon vanilla extract, 1 tablespoon of corn syrup and 2 tablespoons hot water, until smooth.

In a separate bowl, melt the butter and the chocolate in a microwave, 30 seconds at a time, stirring inbetween.  Add the corn syrup and stir until smooth.


 Once the cookies are cooled, face them all bottom-side-up on a clean surface. Spread half of the cookie with vanilla glaze and the other half with chocolate glaze.

Blueberry Cupcakes


Blueberries + Cupcakes -->Scrumptious

This recipe was a kitchen experiment born in my crazy imagination.  I wanted a way to combine blueberries and cupcakes but was slightly scared.  For bakers, to deviate from a recipe could spell disaster.   But come on....cupcakes with plump juicy blueberries and purpley blue buttercream...how can I not take my chances?  This time disaster was diverted and declared a victory for Team Baker, the experiment worked.  I must share with you because it is way too good not to!

Blueberry on Foodista


Blueberry cupcakes
  • 1 1/4 cups plus 2 tablespoons flour
  • 1 1/8 teaspoons baking powder
  • 1/4 teaspoon salt
  • 1/2 cup milk plus 4 tablespoons (this is an approximate just to loosen the batter a bit to compensate for the blueberries)
  • 3/4 teaspoon vanilla extract
  • 1/4 pound (1 stick) butter, at room temperature
  • 1 cup (7 ounces) sugar
  • 2 eggs
  • 3/4 cup frozen blueberries
Heat the oven to 350 degrees. Line standard muffin cups with paper liners.


In a medium bowl, sift together the flour with the baking powder and salt. In a small bowl stir together the milk and vanilla extract. Set aside.
In the bowl of a stand mixer, or in a large bowl using a hand mixer, cream the butter. Gradually add in the sugar, beating until light and fluffy, about 5 minutes.


Beat in the eggs, 1 at a time, until fully incorporated. Beat in the flour and milk mixtures, alternating one-third of each at a time, until each mixture is fully incorporated and the batter is smooth.  Add blueberries and gently fold into batter

Fill each muffin cup three-fourths full of batter. Bake the cupcakes until puffed, set and lightly golden, and a toothpick inserted comes out clean, about 18 to 25 minutes.

Cool the cupcakes before frosting.


Blueberry buttercream
  • 1/2 cup (1 stick) butter at room temperature
  • 3 cups powder sugar
  • 1 teaspoon vanilla extract
  • 1 tablespoon milk
  • 2 heaping spoonfuls blueberries, pureed
In a bowl of a mixer cream butter until it's light and fluffy.  While mixer is set at a low speed  add remaining ingredients.  When all ingredients are fully incorporated, increase the speed until frosting is fluffy.

It is all about the pasta

In my heart, I am Italian!  I will call Italy my home one day...the vineyards, the olives, the architecture...


(focus Kristie)

Where was I?....oh yeah...because of this I have an obsession for anything Italian...most importantly the food!  Two words....tomatoes and basil (mmmmmm).

Making pasta is one of my favorite things to make.  Dried pasta is good, really good but there is just something  about freshly made pasta.  It is lighter, the taste is cleaner, and best of all it can soak up the yummy sauce like a sponge.  Fresh pasta is super easy and I bet you have all the ingredients right now in your pantry.  The process is a bit time consuming but oh so worth the wait, I promise!!!

Egg pasta
  • 2 cups all purpose flour
  • 4 eggs
  • 2 teaspoons olive oil
Combine all of the ingredients in a mixer fitted with a dough hook and mix slowly just until most of the flour is absorbed by the wet ingredients.  When the dough starts to form a ball stop and knead dough by hand on a lightly floured surface.  Add flour as necessary if dough is sticky, I usually have to add around 1/2 cup.  Flour is your friend with pasta, be liberal with dusting your work surface. When the dough is no longer sticky and has a uniform consistency and color form into a ball and cover with an over turned bowl.  Let rest 30  minutes.


After 30 minutes divide dough roughly into 3 parts (while working with one part keep the others under the bowl).  Shape the dough into a flat oval and run through a pasta roller on the largest setting.  Fold rolled pasta in thirds and run through again.  Keep doing this until the dough is smooth.    When smooth run dough into a smaller and smaller settings until it is the desired thickness.  If needed, cut the rolled dough into lengths that are workable for you. Let these ribbons of rolled dough dry for 20 minutes on paper towels. Remember flour is your friend, flour the surface of the dough, and the roller as needed.


Depending on your recipe run it through a roller that will give you the pasta you need (fettuccine, spaghetti, lasagna).  You can use this recipe for any type of pasta you need.


To cook, boil in water until pasta floats to the top, this takes seconds.  Keep an eye on the pasta to avoid over cooking.

Things I have learned....

  • Work in small batches.
  • As soon as I run the dough to cut into pasta I cook it immediately.
  • As soon as pasta is done I transfer it to a  colander set over a bowl to drain water.   I drizzle olive oil over it so it doesn't stick together.


Hope this helps you to enjoy the greatness of fresh pasta...because it is all about the pasta!

Thirsty?


Sweet, pink and full of watermelon.

So, I had this culinary dilemma last weekend.  There was half a watermelon sitting in the fridge and it was going to go bad soon.  So I cranked up the culinary gears in my head and tried to figure out a way to use it....FAST!

The watermelon mojito, with a simple twist, was the perfect solution.  A wonderfully sweet fruity cocktail for a warm summer dinner.    Cheers!

Watermelon Mojito
  • watermelon, cubed
  • Mojito mix
  • light rum (I used Malibu Rum)*
I eyeballed this recipe so I don't have exact measurements but this allows you to adjust the amount of mix or watermelon to your own tastes.

In a blender puree the watermelon until smooth, pour into a small bowl and set aside.  Make mojito as directed on mix.  Add pureed watermelon to the desired level of taste.  Pour into some cocktail glasses over ice.  Garnish with a lime slice.

*if you would like a non-alcoholic version you can use club soda

7.28.2010

Pretty Pretty Flowers


Flowers...they make me giddy...what can I say?
 
An effortless vase of fresh flowers can brighten a room on a rainy day...what am I saying...they can brighten a room on a sunny day...they are perfect brilliance.  Peonies certainly make my top 5 favorites list, how can I resist those perfectly scrumptious blushing pink petals?  Ahhh...pure giddiness!!!

What is your idea of perfect brilliance??  What makes you giddy?

Summer Lemons


Tart & tangy lemony goodness!

Not sure why but when summer comes around so do my cravings for lemons.  Lemon bars...lemonade...lemon curd tarts...there is no end to the madness.  I love sweetening my summer days with a touch of tang.  Every year I spend hours scouring the internet for new lemon-centric recipes to try out.  This year I have not only found a superbly lemon-filled recipe but a simple one to boot.  Lemon glazed cookies have made my lemon-starved taste buds dance and I hope they do the same for you!  The glaze is super simple and I am already scheming of other uses for it...it is that good!  Any suggestions??

Lemon Glazed Cookies (thank you Martha Stewart!)
  • 2 cups all-purpose flour
  • 1/2 teaspoon baking soda
  • 1/2 teaspoon salt
  • 1 tablespoon finely grated lemon zest, plus 2 tablespoons fresh lemon juice
  • 1/2 cup (1 stick) unsalted butter, room temperature
  • 1 cup sugar
  • 1 egg
  • 1 teaspoon vanilla extract
Preheat oven to 350 degrees. In a medium bowl, whisk together flour, baking soda, salt, and lemon zest. In a large bowl, using an electric mixer, beat butter and sugar until light and fluffy. Add egg, vanilla, and lemon juice and beat until combined. With mixer on low, beat in flour mixture.
Drop dough by heaping tablespoons, 1 inch apart, onto two baking sheets. Bake until edges are golden, 15 to 20 minutes, rotating sheets halfway through. Let cool.

Lemon Glaze
  • 2 cups confectioners' sugar
  • 2 tablespoons finely grated lemon zest
  • 1/3 cup fresh lemon juice
In a medium bowl, whisk together 2 cups confectioners' sugar, 2 tablespoons finely grated lemon zest, and 1/3 cup fresh lemon juice until smooth.

7.27.2010

A Fantastic Chicken Dinner

Yep I said it...it was a FANTASTIC chicken dinner!  Now I have to admit it wasn't perfect but it was darn good.  I think this is the beginning of a beautiful friendship.

I have to admit something before sharing last night's recipes.  This sounds silly I know but, I have recipe ADD.  I am usually not happy following just one recipe, and thus I mix and match recipes to come up with the right combination of ingredients.  Because of this some measurements are approximates, I tend to go by sight and smell when cooking.  I will do my best, I promise, to be as accurate as possible!

Now on to the good stuff....

The menu:
Garlic Lemon Roasted Chicken (recipe follows)
Quinoa and Corn Salad (recipe follows)
Homemade French Bread
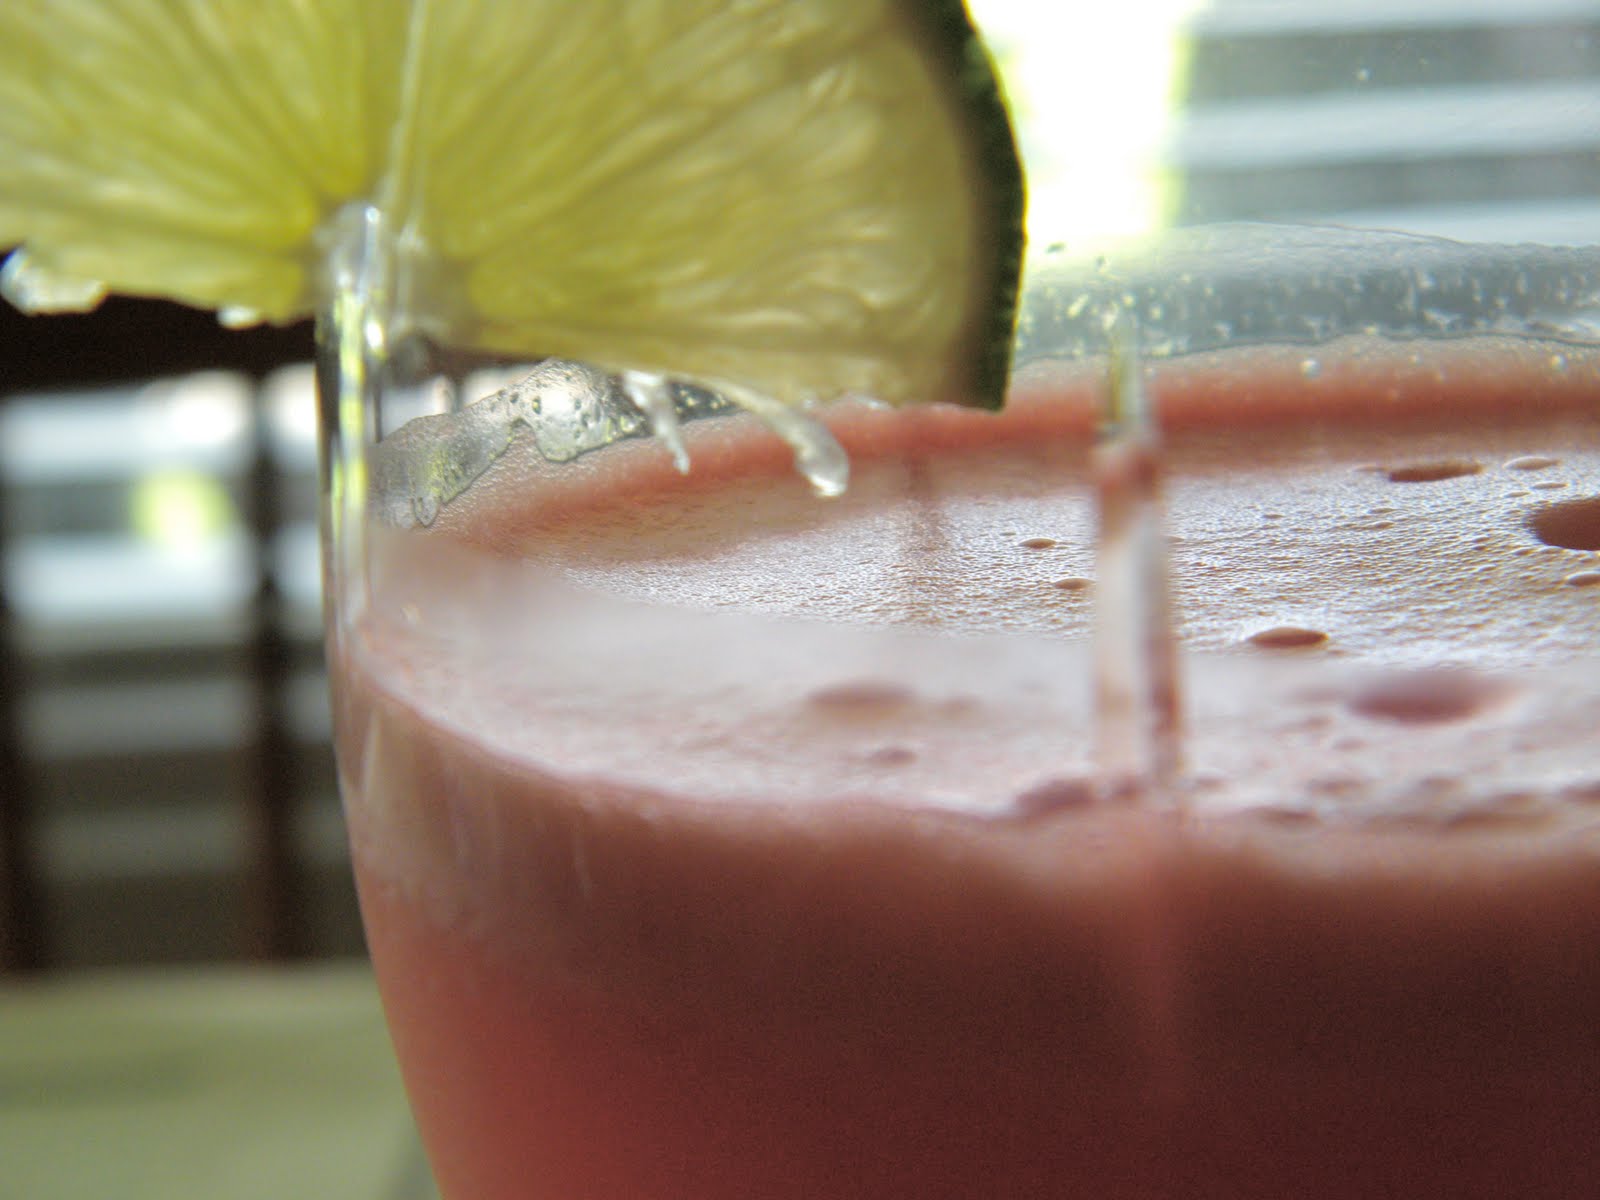
and for cocktail hour....Watermelon Mojitos


Lemon Garlic Roast Chicken
  • 1 5lb whole chicken (fresh or thawed), rinsed and patted dry
  • Salt and pepper, to taste
  • 1/2 cup (1 stick) butter
  • 2 lemons
  • 9 cloves of garlic
  • 1/2 onion
  • 26 oz chicken stock or broth
Let chicken and butter stand out for about 30 minutes to reach room temperature.  Preheat oven to 425 degrees.  Remove giblets and anything else that might be in the body cavity of the chicken.  Rinse and towel dry chicken.   Sprinkle salt and pepper inside and outside of chicken; don't be stingy!
Next slice onion, 1 lemon and the cloves of garlic.  Place onion, lemon and all but 2 cloves of garlic on the bottom of your pan making a bed for your chicken to sit on.  Place chicken in pan.  Half remaining lemon and place inside of chicken along with 2 cloves of garlic.

Coat chicken liberally with the softened butter.  This step  can get a bit sloppy, but isn't it fun to make a mess??  Make sure you coat the WHOLE chicken including getting under the skin (my mom hates this part!).  If needed, salt and pepper chicken again. Pour about half of stock into bottom of pan.
Cover with foil and bake for approximately 1 hour.  Check chicken occasionally during roasting, if needed you can add chicken stock if it seems to be getting dry.  Remove foil and continue to roast for 30 minutes more or until the juices run clear and a meat thermometer reads 180 in the breast and 190 in the thigh.

Let chicken rest on a plate for 10 - 15 minutes.  Meanwhile pour pan juices, minus the lemon slices, into a small sauce pan.  Make sure you get all of the good meaty brown bits off of the bottom of the pan.  The more "stuff" you get out of the pan the better your sauce will taste!   Using either a fat separator or a spoon, skim off the fat.  Simmer juices about 15 minutes, taste.  If too salty add more stock, if bland add salt and pepper to taste.

When serving you can choose to pour a bit of sauce over chicken or serve on the side in a gravy boat or dish.


Quinoa and Corn Salad
  • 1/4 cup freshly squeezed lemon juice
  • 1 teaspoon ground cumin
  • 1 teaspoon chili powder
  • 1 medium garlic clove, minced or pressed
  • 1/2 cup extra-virgin olive oil
  • 1 1/2 cups quinoa, thoroughly rinsed and drained (about 4 Cups cooked)
  • 2 ears corn, kernels cut from cob
  • 1/2 yellow onion, diced
  • 1 medium red pepper, cored, seeded, and diced
  • 3 scallions, thinly sliced
  • 1/4 cup roughly chopped fresh cilantro leaves
  • salt and pepper, to taste
Bring 2 3/4 cups water to boil in a small saucepan and stir in the quinoa and some salt. Return to boil, reduce heat to simmer, cover, and cook until water is absorbed, about 15 minutes. Add corn, red pepper, onion.  Cover and continue to simmer on low until onion is tender.

In a small bowl, whisk together lemon juice, cumin, chili powder, garlic, oil, and salt to taste; pour over quinoa. Cover and simmer on low until heated through.

Add scallions and cilantro. Stir thoroughly.  Salt and pepper to taste.