Showing posts with label cooking. Show all posts

1.30.2011

Cold day = soup

So this was the view from my front door last week:


So there is nothing else I can do but make soup.  A good hearty one preferably.

Martha Stewart's Sausage and Kale Soup looked like the perfect soup for the day....yet there was one problem:

No chicken sausage.
No kale.

But I gotta have soup...didn't you see that picture above, how can I not have soup on a snowy day like that?  So plan B: substitute (because there was no way I was getting out in THAT!)  So one look in the refrigerator and I had my alternates...turkey Italian sausage and baby spinach.  That settled that...soup was back on the menu boys! 


Turkey Sausage and Spinach Soup
adapted from Martha Stewart

1 tablespoon olive oil
1 onion, diced
2 garlic cloves, minced
1/4 teaspoon crushed red-pepper flakes
5 waxy potatoes peeled and cut into 1/2-inch chunks
3 cans (14 1/2 ounces each) chicken broth
12 oz (approx.) baby spinach
12 ounces (about 3 links) Italian turkey sausage

In a large pot, heat oil over medium heat. Add onion and cook until soft, stirring, 2 to 3 minutes. Add garlic and cook approx 1 minute. Add potatoes and broth; bring to a boil. Reduce heat; simmer until potatoes are tender, 10 to 15 minutes.

In a skillet over medium heat crumble and cook turkey sausage, minus the casing, until brown and no redness remains.  Set aside.


In a blender, puree half the soup. Return to pot; add sausage and spinach. Simmer until spinach is wilted.

8.31.2010

Fish Tacos


I am on a mission.  A mission to make the perfect fish taco.

For years I have been hunting, experimenting and tweaking fish taco recipes....I may be a tad bit obsessed!  I am not sure what makes the perfect fish taco, I just know that when I taste it I will know, a cook's intuition you could say.  I am seeking the perfect blend of delicate flakiness and hearty crunch, a spicy bite with a cool touch, and dang it I will find it!  

So what am I tweaking this time?  The fish.   Usually I just grill the fish fillets but this time I decided to try something I have been wanting to try for years, a potato chip "breading".  I thought it would add a kick of crunch that was missing....and it did!  The fish had a surprising crunch that added a depth to the taco that it so needed.  Combined with the spicy cilantro creme and cabbage it was a huge step towards perfection! 
    
Super easy and slightly unexpected make these tacos a joy to dive into on a warm summer evening, especially when paired with a nice cold beer!

Crunchy Fish Tacos
  • 2 fillets of white fish (I used cod but any white fish will work)
  • 2 limes
  • 1 clove of garlic, minced
  • 2 eggs
  • Several handful of potato chips (that is a very scientific measurement by the way!  :)  )
  • Corn tortillas
  • Shredded cabbage blend (I used a cole slaw blend to make it easy)
  • Cilanto Creme (recipe follows)

Marinate the fish fillets in the juice of two limes and minced garlic for 30 minutes, set aside.  Place  the potato chips in a plastic zip bag and crush until they are pretty fine, but still large enough to recognize that they are potato chips.  If they are too big they will not stick onto the fish fillets.  Place crushed potato chips onto a plate.  Beat two eggs in a small bowl and set aside. 

After the fish have marinated cut into smaller pieces, I cut down the center of the fillets creating smaller fish stick sized pieces.  Dip the cut pieces into the eggs and turn to coat, drain off excess.  Transfer to the crushed potato chips and turn to coat.  Place breaded fish into a pan with about 2 tablespoons oil set over medium heat.  Fry for approximately 5 minutes each side or until fish is golden and flaky.  Set aside on paper towels to absorb any excess oil.

In a lightly oiled pan over medium heat fry the corn tortillas, a couple minutes on each side.  Again place on paper towel to absorb oil.

To assemble your tacos place 2 tablespoons Cilantro Creme down the center of tortilla.  Place the fried fish on creme and top with the cabbage blend.  If you want to add a bit more flare and color, add a couple of whole cilantro leaves on top!  Enjoy!!

Cilantro Creme
  • 8 oz sour cream
  • 1 cup cilantro
  • 2 scallions
  • 1/2 Serrano pepper, or more depending on how hot you want it
  • Salt and pepper, to taste

In a food processor place cilantro, scallions, and Serrano pepper (minus the seeds) and blend until finely chopped.  Add sour cream and continue to blend until mixed well.  Add salt and pepper to taste.  Refrigerate at least 30 minutes before trying, the longer it chills the better it is!

8.15.2010

Zucchini alla Parmigiana


It is time to celebrate!

Celebrate what you ask?  Zucchini season!

Yep, this is the time of year when the stores and farmer's markets are filled with the delicate loveliness of zucchini.  I happen to be a huge fan of this vegetable (did you know that zucchini is technically a fruit, I never knew).  It can be used in a variety of ways, both savory and sweet, and all are perfectly wonderful.  Personally I love to saute it simply with olive oil and garlic, but this past weekend I decided to do something a bit more. 

Zucchini tends to be the supporting dish, always pushed aside for the main dish....this time I wanted to make it the star of the show...what I am trying to say is, nobody puts zucchini in a corner (love that movie quote!!) at least not this time.  Zucchini alla Parmigiana is a beautiful combination of all things Italian: lightly fried zucchini, tomato sauce, mozzarella and parmigiano-reggiano cheeses, and last but certainly not least fresh basil!  A one dish wonder that is certainly the star of any dinner. 

Just in case you are a fan of eggplant feel free to substitute it for the zucchini as this dish is originally made with eggplant.  I think you will find it equally as fantastic!
 

Zucchini alla Parmigiana
     adapted from: Melanzane all Parmigiana
  • 3 garlic cloves, minced
  • 4 cups (approx.) of canned tomatoes, crushed
  • Fresh basil leaves
  • 1 tsp. sugar
  • 4-5 medium-sized zucchini
  • 2 eggs
  • 2 cups flour (approx.), used for dredging 
  • 1 medium mozzarella (4 oz), diced, or the 12 oz tub of bocconcini -sized mozzarella, quartered
  • 12 oz (approx.) Parmigiano, grated
  • Vegetable oil for frying
  • Salt and pepper, to taste

Preheat oven to 350 degrees.

In a sauce pan over medium heat saute the garlic in a bit of olive oil until slightly browned.  Add the tomatoes, salt, sugar and basil.  Simmer for approximately 20 minutes.  


Slice the zucchini lengthwise.  Try to keep the thickness consistent, around 1/2 inch is good.  In a small bowl beat the two eggs, pour out onto a plate.  On another plate place the flour.  Heat a good amount of oil in a large frying pan.  Dredge the zucchini slices in the flour, turn to coat and then dip each slice into the eggs, turn to coat.  Fry the zucchini for around 3 minutes each side, be careful not to crowd the pan.  Set aside each slice on paper towels to absorb excess oil. 
 
In a large, greased 9 x 13" baking pan spoon a generous amount of tomato sauce.  Set the fried zucchini in a single layer, top with mozzarella and parmigiano.  Repeat for a second layer, tomato sauce, zucchini, mozzarella, parmigiano.  Finish by topping with the remaining sauce, parmigiano cheese (be generous) and fresh basil.


Bake for 10-15 minutes. Allow to cool for 10 more minutes.  It is now ready to eat and enjoy. 


8.05.2010

The Season for Ice Cream


Who doesn't like ice cream...that is what I want to know?  Creamy, wonderfully sweet, and most importantly on summer days, it is COLD!...

(Unlike my forehead, the steering wheel or sidewalk!)

Ice cream and summer, they just go hand-in-hand.  It is undeniable, you can't have one without the other.  It is impossible...I have tried...it wasn't pretty!

Do you have a favorite summer ice cream memory?

Mine has to do with a certain smurf-blue bubblegum flavor.  When summer rolled around the ice cream shops opened and that was always my first choice.  It was a kid's dream...ice cream and bubblegum, holy sweetness overload!

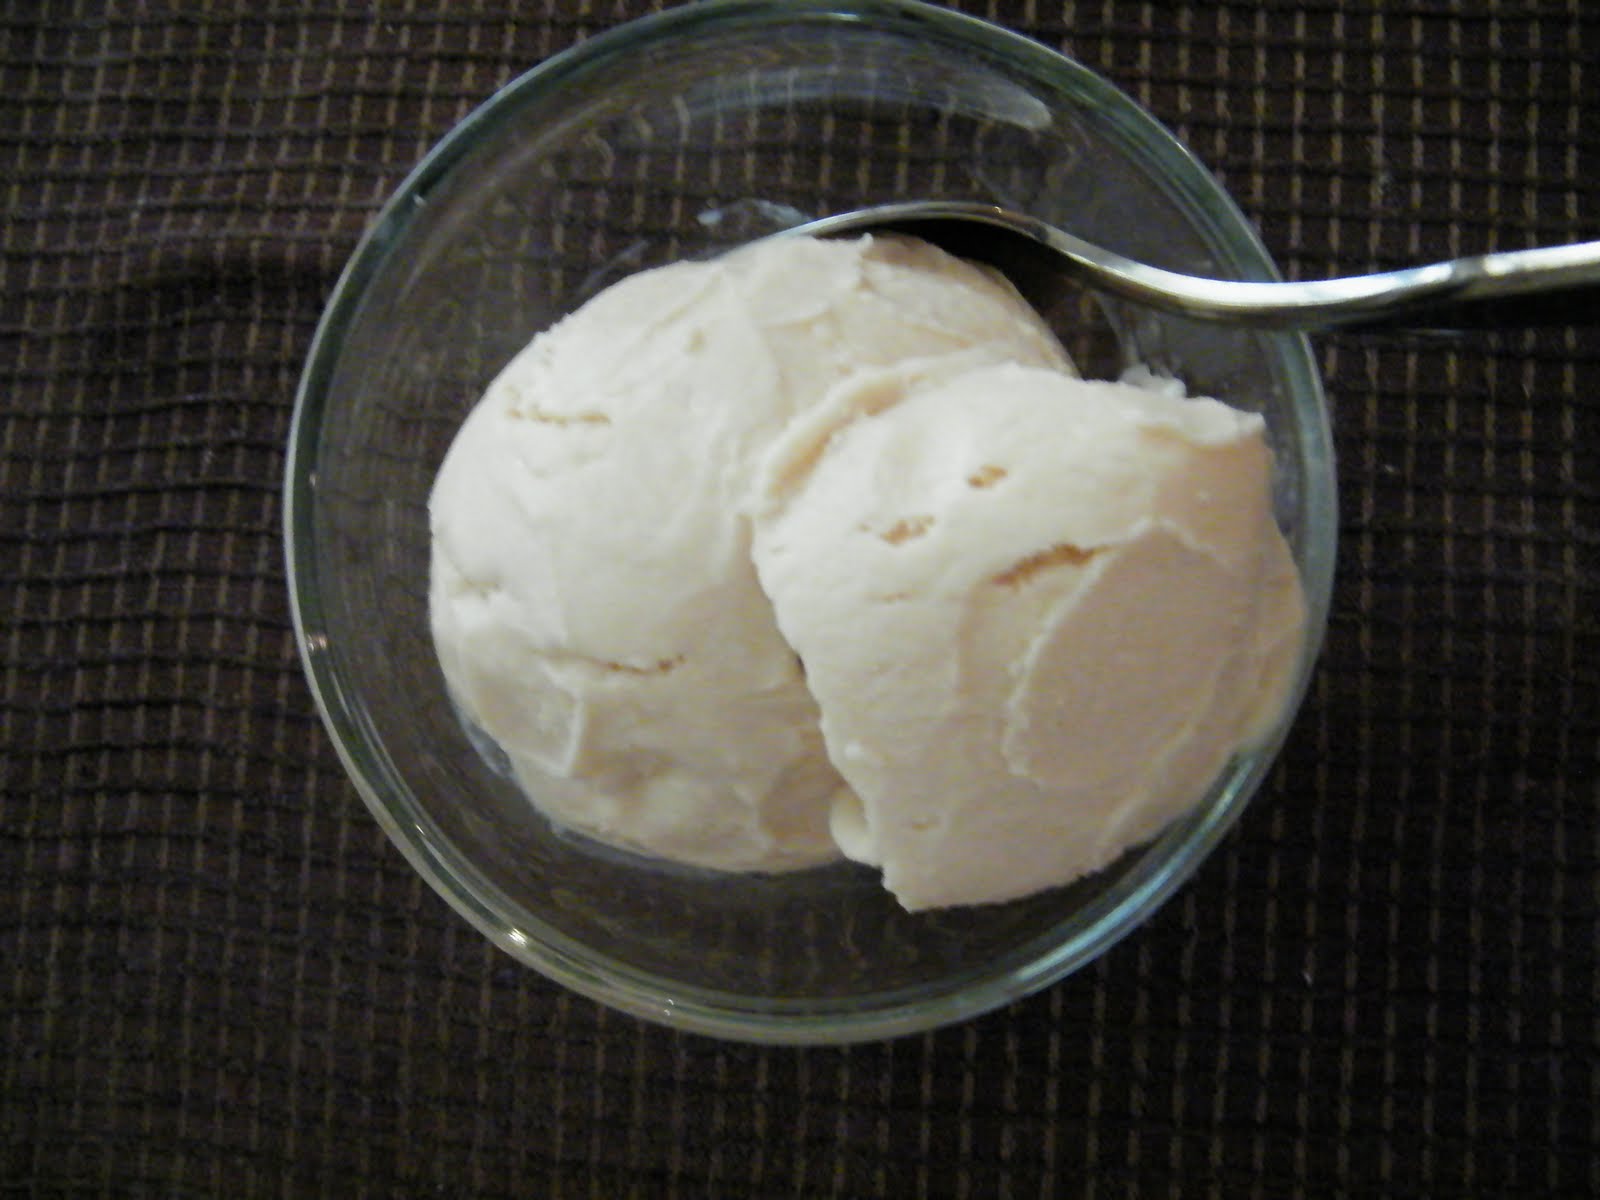
And just like my childhood, once the summer hit, my ice cream maker opened for business!  I chose a super sweet, caramel-y flavor for the first of the season,  dulce de leche.  I am not going to lie, this recipe requires some patience.  The dulce de leche part of this creamy concoction takes 45 minutes of attention.  I suggest doing the dulce de leche and the first part of the the ice cream recipe the day before, chill it over night and pop it in the ice cream maker the next morning.  Made the long process not so bad! 

Believe me when I say that it is so worth it.  I enjoyed every second of it, plus it was fantastic with the home made apple pie that was on hand!

Dulce de Leche
  • 2 pt (4 cups) milk
  • 12 oz sugar
  • 1/4 tsp baking soda
  • 1/2 tsp vanilla extract
Combine milk, sugar and baking soda in a heavy sauce pan.  Over medium heat bring to a slow boil.  DO NOT STIR!

As the mixture approaches a boil it will start to rise.  Take it off the heat before it foams over.  Stir.

Set the pan over low heat and cook slowly, stirring frequently with a wooden spoon for about 45-60 minutes.  The mixture will slowly caramelize.

When the mixture turns a rich caramel-y brown and thickens (if  you wipe your finger over the back side of the spoon and it leaves a path then it is thick enough) but is still pourable remove from heat and stir in the vanilla.

Cool thoroughly.

Beginning of the process, milk is still thin and white in color

Starting to caramelize but still too thin

Final product...yummmm!


Dulce de Leche Ice Cream (pt. 2)
  • 3 cups milk
  • Dulce de Leche you made above
  • 6 oz heavy cream
  • 1/4 tsp vanilla
  • pinch of salt

Heat milk and the dulce de leche mixture in a heavy sauce pan until the dulce de leche is completely dissolved.  Remove from heat and add the remaining ingredients.  Chill well.

Place mixture in the bowl of an ice cream maker, and follow the manufacturers instructions for your particular ice cream maker.  I churned mine for about 30 minutes.  Place in a container with a air tight lid in freezer to continue the freezing process. 

8.01.2010

Tomato Sandwiches


A fantastic couple, tomatoes and basil.  I can't think of a better match.  Well, maybe chocolate and caramel....oh crap! That is besides the point!

What I mean is....

Tomatoes and basil are perfect for one another. Tomatoes are great on their own, delightful in fact, but add basil and...BAM!  They are freaking fantastic. They bring out the best in each other, kinda like peanut butter and jelly....oh crap, another great match!

So....yeah...tomatoes and basil - I think I am their # 1 fan...and perhaps...I may even be accused of obsessing a bit. I am always trying to find new ways to combine the two.  For the summer I have the perfect dish to satisfy my obsession - a tomato sandwich with an Italian touch.
Tomato Sandwiches
  • Ciabatta bread (or any type of bread that is a favorite)
  • olive oil
  • tomato slices, the fresher the better
  • pesto, this can be home made or store bought which ever you prefer
  • mayo
  • salt & pepper to taste
Slice the Ciabatta bread into fairly thin slices.  Brush one side of each slice lightly with olive oil.  Place oil side down on a grill pan (I just have this thing for grill marks...so cool!) or a griddle.  Toast to desired level.  In a small bowl mix about a tablespoon, or more depending on the size of your bread slices, each of mayo and pesto.  Since I love pesto I add just a touch more pesto than mayo...up to you.  Slice the tomatoes about 1/4-1/2" thick.  Spread pesto/mayo mixture over the toasted bread.  Layer the slices of tomatoes and top with salt and pepper to taste. 

There you have it a fantastic way to celebrate the union of two great ingredients...and super easy too!  Enjoy!!!

7.30.2010

Mmm...cheese


So there is little in this world that is more perfect than cheese. It can accompany wine to a black tie event, yet can relax at home with simple crackers...it would have been voted most popular in high school (and most likely to succeed!!!)

Is it obvious that I put cheese on a pedestal?  It can do no wrong!  So when I came across this recipe it was a no-brainer...it was going on the menu.  These fritters are delicious and easy.  Plus it lends itself to anything your creative imagination can come up with.   Substitute the cheeses with your favorites, add some spices...get crazy and have fun with it!!

If you need a push to get those juices flowing...

Cheeses: Gouda, chedder, mozzarella, Italian blend (mozzarella, romano, parmigiana)
Spices: garlic powder, onion powder, red pepper flakes, paprika, basil, oregano
Ok...now there is no excuse...get to it, the cheese is waiting!

Fritters:
  • 1 1/2 cups fresh whole milk ricotta
  • 1 1/2 cups shredded smoked mozzarella
  • 1/4 teaspoon salt
  • 1/4 teaspoon freshly ground black pepper
  • 2 cups panko (Japanese bread crumbs)
  • 2 large eggs
  • all-purpose flour
  • Vegetable oil, for frying
For the Fritters: In a small bowl combine the ricotta, smoked mozzarella, salt, and pepper.  On bowl #1 put the flour about a cup or so.  In bowl #2 beat the two eggs, and in bowl #3 pour in the panko.  Line a tray or large plate with parchment paper.


Scoop a 1 1/2 tablespoon ball of the cheese mixture into the flour and roll to coat. Transfer the ball to the eggs and roll to coat. Transfer the cheese ball to the panko and again roll to coat. Transfer the ball to the parchment-lined tray. Continue with the remaining cheese mixture.


Meanwhile heat 3 inches of vegetable oil in a large skillet to 350 degrees F. Fry fritters in batches, being careful not to overcrowd the pan, until golden, about 1 to 2 minutes. Remove with a slotted spoon to paper towel to drain.  Serve warm with Balsamic Dipping Sauce.


Balsamic Dipping Sauce:
  • 6 tablespoons balsamic vinegar
  • 2 tablespoons lemon juice
  • 2 tablespoons Dijon mustard
  • 1 tablespoon honey
  • 1/2 cup extra-virgin olive oil
  • 1/2 teaspoon salt
  • 1/2 teaspoon freshly ground black pepper
Combine the vinegar, lemon juice, mustard, and honey in a blender. Blend until combined. Add the oil in a steady stream while the machine is running. Season with the salt and pepper. Serve in a small bowl alongside the fritters.

7.29.2010

It is all about the pasta

In my heart, I am Italian!  I will call Italy my home one day...the vineyards, the olives, the architecture...


(focus Kristie)

Where was I?....oh yeah...because of this I have an obsession for anything Italian...most importantly the food!  Two words....tomatoes and basil (mmmmmm).

Making pasta is one of my favorite things to make.  Dried pasta is good, really good but there is just something  about freshly made pasta.  It is lighter, the taste is cleaner, and best of all it can soak up the yummy sauce like a sponge.  Fresh pasta is super easy and I bet you have all the ingredients right now in your pantry.  The process is a bit time consuming but oh so worth the wait, I promise!!!

Egg pasta
  • 2 cups all purpose flour
  • 4 eggs
  • 2 teaspoons olive oil
Combine all of the ingredients in a mixer fitted with a dough hook and mix slowly just until most of the flour is absorbed by the wet ingredients.  When the dough starts to form a ball stop and knead dough by hand on a lightly floured surface.  Add flour as necessary if dough is sticky, I usually have to add around 1/2 cup.  Flour is your friend with pasta, be liberal with dusting your work surface. When the dough is no longer sticky and has a uniform consistency and color form into a ball and cover with an over turned bowl.  Let rest 30  minutes.


After 30 minutes divide dough roughly into 3 parts (while working with one part keep the others under the bowl).  Shape the dough into a flat oval and run through a pasta roller on the largest setting.  Fold rolled pasta in thirds and run through again.  Keep doing this until the dough is smooth.    When smooth run dough into a smaller and smaller settings until it is the desired thickness.  If needed, cut the rolled dough into lengths that are workable for you. Let these ribbons of rolled dough dry for 20 minutes on paper towels. Remember flour is your friend, flour the surface of the dough, and the roller as needed.


Depending on your recipe run it through a roller that will give you the pasta you need (fettuccine, spaghetti, lasagna).  You can use this recipe for any type of pasta you need.


To cook, boil in water until pasta floats to the top, this takes seconds.  Keep an eye on the pasta to avoid over cooking.

Things I have learned....

  • Work in small batches.
  • As soon as I run the dough to cut into pasta I cook it immediately.
  • As soon as pasta is done I transfer it to a  colander set over a bowl to drain water.   I drizzle olive oil over it so it doesn't stick together.


Hope this helps you to enjoy the greatness of fresh pasta...because it is all about the pasta!

7.27.2010

A Fantastic Chicken Dinner

Yep I said it...it was a FANTASTIC chicken dinner!  Now I have to admit it wasn't perfect but it was darn good.  I think this is the beginning of a beautiful friendship.

I have to admit something before sharing last night's recipes.  This sounds silly I know but, I have recipe ADD.  I am usually not happy following just one recipe, and thus I mix and match recipes to come up with the right combination of ingredients.  Because of this some measurements are approximates, I tend to go by sight and smell when cooking.  I will do my best, I promise, to be as accurate as possible!

Now on to the good stuff....

The menu:
Garlic Lemon Roasted Chicken (recipe follows)
Quinoa and Corn Salad (recipe follows)
Homemade French Bread
and for cocktail hour....Watermelon Mojitos


Lemon Garlic Roast Chicken
  • 1 5lb whole chicken (fresh or thawed), rinsed and patted dry
  • Salt and pepper, to taste
  • 1/2 cup (1 stick) butter
  • 2 lemons
  • 9 cloves of garlic
  • 1/2 onion
  • 26 oz chicken stock or broth
Let chicken and butter stand out for about 30 minutes to reach room temperature.  Preheat oven to 425 degrees.  Remove giblets and anything else that might be in the body cavity of the chicken.  Rinse and towel dry chicken.   Sprinkle salt and pepper inside and outside of chicken; don't be stingy!
Next slice onion, 1 lemon and the cloves of garlic.  Place onion, lemon and all but 2 cloves of garlic on the bottom of your pan making a bed for your chicken to sit on.  Place chicken in pan.  Half remaining lemon and place inside of chicken along with 2 cloves of garlic.

Coat chicken liberally with the softened butter.  This step  can get a bit sloppy, but isn't it fun to make a mess??  Make sure you coat the WHOLE chicken including getting under the skin (my mom hates this part!).  If needed, salt and pepper chicken again. Pour about half of stock into bottom of pan.
Cover with foil and bake for approximately 1 hour.  Check chicken occasionally during roasting, if needed you can add chicken stock if it seems to be getting dry.  Remove foil and continue to roast for 30 minutes more or until the juices run clear and a meat thermometer reads 180 in the breast and 190 in the thigh.

Let chicken rest on a plate for 10 - 15 minutes.  Meanwhile pour pan juices, minus the lemon slices, into a small sauce pan.  Make sure you get all of the good meaty brown bits off of the bottom of the pan.  The more "stuff" you get out of the pan the better your sauce will taste!   Using either a fat separator or a spoon, skim off the fat.  Simmer juices about 15 minutes, taste.  If too salty add more stock, if bland add salt and pepper to taste.

When serving you can choose to pour a bit of sauce over chicken or serve on the side in a gravy boat or dish.


Quinoa and Corn Salad
  • 1/4 cup freshly squeezed lemon juice
  • 1 teaspoon ground cumin
  • 1 teaspoon chili powder
  • 1 medium garlic clove, minced or pressed
  • 1/2 cup extra-virgin olive oil
  • 1 1/2 cups quinoa, thoroughly rinsed and drained (about 4 Cups cooked)
  • 2 ears corn, kernels cut from cob
  • 1/2 yellow onion, diced
  • 1 medium red pepper, cored, seeded, and diced
  • 3 scallions, thinly sliced
  • 1/4 cup roughly chopped fresh cilantro leaves
  • salt and pepper, to taste
Bring 2 3/4 cups water to boil in a small saucepan and stir in the quinoa and some salt. Return to boil, reduce heat to simmer, cover, and cook until water is absorbed, about 15 minutes. Add corn, red pepper, onion.  Cover and continue to simmer on low until onion is tender.

In a small bowl, whisk together lemon juice, cumin, chili powder, garlic, oil, and salt to taste; pour over quinoa. Cover and simmer on low until heated through.

Add scallions and cilantro. Stir thoroughly.  Salt and pepper to taste.

7.26.2010

Cooking School: Roasted Chicken


Always walk through life as if you have something new to learn and you will. ~Vernon Howard

I am walking through this dinner as if I had something to learn….because I do.  I am going back to school and learning what makes a chicken tick.

Chicken and I have a love/hate relationship.  I love to make it but it hates to turn out.  Either it is a bit too dry or a bit too bland. In culinary school roasting a chicken was the classic and most basic way to introduce us to this popular protein.  I didn’t have a problem then, chicken and I were friends.

But….

Things have gone down hill since….until tonight.  I have had enough and am fighting back!  I am cracking open my old textbook and reintroducing myself to chicken.

“Hi chicken this is Kristie and this is going to be a fantastic friendship!!!”

Wish me luck!